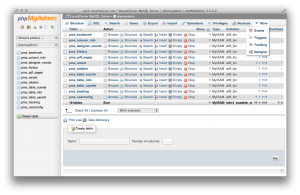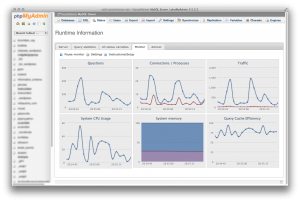
phpMyAdmin database display
I recently ran into a problem with the upgraded 3.5.2 phpMyAdmin package provided via the rpmforge.repo. Search no longer works, nor does pagination, etc. Plus, it’s out of date and vulnerable to an XSS exploit.
I have solved this by changing to the EPEL repo, which maintains the latest version of phpMyAdmin.
This post will teach you how to install phpMyAdmin on CentOS, Amazon Linux, or Redhat. Configuration instructions are provided for Apache and NginX web servers.
For this to work properly and safely, you should be running SSL on your host. Otherwise, change the ForceSSL line in the config file provided below…
Install phpMyAdmin from EPEL repository
Uninstall current PMA:
yum erase phpMyAdmin
Set up EPEL repo:
Find the latest epel-release at http://download.fedoraproject.org/pub/epel/6/x86_64/
rpm -Uvh http://download.fedoraproject.org/pub/epel/6/x86_64/epel-release-6-8.noarch.rpm
On Amazon Linux, epel-release is already loaded. Edit /etc/yum.repos.d/epel.repo to enabled=1
Edit /etc/yum.repos.d/epel.repo to only include necessary software packages:
includepkgs=phpMyAdmin php-php-gettext
I have removed RPMforge repo due to some recent problems, but if you still need rpm forge repo:
exclude=phpMyAdmin php-php-gettext
Install PMA:
yum install phpMyAdmin
Apache
- Allow all incoming hosts for a web hosting server, or only allow hosts you require: localhost, your local workstation, etc.)
- For a hosting server with open access, you should have a login failure daemon to block offending IP addresses with multiple failed HTTP logins. ConfigServer Firewall works well, and has modules for cPanel and Webmin. OSSEC is another reactive IPTables firewall with Apache login failure IP blacklisting.
- For Amazon EC2, a good practice is to create a discrete database server, and only allow access to it inside a VPC security group, or from specific IP addresses enabled in that security group. That way, you can safely Allow from ALL hosts, because the VPC firewall will prevent other access. Install phpMyAdmin on a separate web server, and restrict access to PMA’s directory (see below).
# phpMyAdmin - Web based MySQL browser written in php
#
# Allows only localhost by default
#
# But allowing phpMyAdmin to anyone other than localhost should be considered
# dangerous unless properly secured by SSL

Alias /phpMyAdmin /usr/share/phpMyAdmin
Alias /phpmyadmin /usr/share/phpMyAdmin

<Directory /usr/share/phpMyAdmin/>
   <IfModule mod_authz_core.c>
     # Apache 2.4
     <RequireAny>
       Require ip 127.0.0.1
       Require ip ::1
     </RequireAny>
   </IfModule>
   <IfModule !mod_authz_core.c>
     # Apache 2.2
     Order Deny,Allow
     # comment out Allow from All and add your own static IPs here for security
     # Allow from All
     Allow from 123.456.7.89
     Allow from 12.345.67.89
     Allow from 127.0.0.1
     Allow from ::1
   </IfModule>
</Directory>

<Directory /usr/share/phpMyAdmin/setup/>
   <IfModule mod_authz_core.c>
     # Apache 2.4
     <RequireAny>
       Require ip 127.0.0.1
       Require ip ::1
     </RequireAny>
   </IfModule>
   <IfModule !mod_authz_core.c>
     # Apache 2.2
     Order Deny,Allow
     Deny from All
     Allow from 127.0.0.1
     Allow from ::1
   </IfModule>
</Directory>

# These directories do not require access over HTTP - taken from the original
# phpMyAdmin upstream tarball
#
<Directory /usr/share/phpMyAdmin/libraries/>
    Order Deny,Allow
    Deny from All
    Allow from None
</Directory>

<Directory /usr/share/phpMyAdmin/setup/lib/>
    Order Deny,Allow
    Deny from All
    Allow from None
</Directory>

<Directory /usr/share/phpMyAdmin/setup/frames/>
    Order Deny,Allow
    Deny from All
    Allow from None
</Directory>

# This configuration prevents mod_security at phpMyAdmin directories from
# filtering SQL etc.  This may break your mod_security implementation.
#
#<IfModule mod_security.c>
#    <Directory /usr/share/phpMyAdmin/>
#        SecRuleInheritance Off
#    </Directory>
#</IfModule>
NginX
Edit nginx.conf for the hostname’s server_name website
       location /phpMyAdmin {
               root /usr/share/;
               index index.php;
               location ~ ^/phpMyAdmin/(.+\.php)$ {
                       try_files $uri =404;
                       root /usr/share/;
                       fastcgi_pass localhost:9002;
                       fastcgi_param HTTPS on;
                       fastcgi_index index.php;
                       fastcgi_param SCRIPT_FILENAME /usr/share$fastcgi_script_name;
                       include /etc/nginx/fastcgi_params;
                       fastcgi_buffer_size 128k;
                       fastcgi_buffers 256 4k;
                       fastcgi_busy_buffers_size 256k;
                       fastcgi_temp_file_write_size 256k;
                       fastcgi_intercept_errors on;
               }
               location ~* ^/phpMyAdmin/(.+\.(jpg|jpeg|gif|css|png|js|ico|html|xml|txt))$ {
                       root /usr/share/;
               }
        }

        location /phpmyadmin {
               rewrite ^/* /phpMyAdmin last;
        }
Edit /etc/phpMyAdmin/config.inc.php
The config below shows some common config options. Important ones are ForceSSL and auth_type. For a production server, SSL should be ON and auth_type http is better; http auth uses MySQL user/pass combinations to restrict access to user-specific databases.
<?php
/* Servers configuration */
$i = 0;

/* Server: MySQL Server [1] */
$i++;
$cfg['Servers'][$i]['verbose'] = 'MySQL Server';
$cfg['Servers'][$i]['host'] = '122.34.567.89';
$cfg['Servers'][$i]['port'] = '3306';
$cfg['Servers'][$i]['socket'] = '';
$cfg['Servers'][$i]['connect_type'] = 'tcp';
$cfg['Servers'][$i]['extension'] = 'mysqli';
$cfg['Servers'][$i]['auth_type'] = 'http';
$cfg['Servers'][$i]['user'] = 'pma';
$cfg['Servers'][$i]['password'] = '';
$cfg['Servers'][$i]['pmadb'] = 'phpmyadmin';
$cfg['Servers'][$i]['controluser'] = 'pma';
$cfg['Servers'][$i]['controlpass'] = 'pmapassword';
$cfg['Servers'][$i]['bookmarktable'] = 'pma_bookmark';
$cfg['Servers'][$i]['relation'] = 'pma_relation';
$cfg['Servers'][$i]['userconfig'] = 'pma_userconfig';
$cfg['Servers'][$i]['table_info'] = 'pma_table_info';
$cfg['Servers'][$i]['column_info'] = 'pma_column_info';
$cfg['Servers'][$i]['history'] = 'pma_history';
$cfg['Servers'][$i]['recent'] = 'pma_recent';
$cfg['Servers'][$i]['table_uiprefs'] = 'pma_table_uiprefs';
$cfg['Servers'][$i]['tracking'] = 'pma_tracking';
$cfg['Servers'][$i]['table_coords'] = 'pma_table_coords';
$cfg['Servers'][$i]['pdf_pages'] = 'pma_pdf_pages';
$cfg['Servers'][$i]['designer_coords'] = 'pma_designer_coords';

/* End of servers configuration */

$cfg['UploadDir'] = '/tmp';
$cfg['SaveDir'] = '/tmp';
/* only if your host supports SSL */
$cfg['ForceSSL'] = true;
$cfg['DefaultLang'] = 'en';
$cfg['ServerDefault'] = 1;
?>
Create the phpmyadmin database for advanced functionality
Look in phpMyAdmin folder /usr/share/phpMyAdmin/examples for create_tables.sql
ssh to server as root user
mysql

-- or if it asks for password --

mysql -u your-mysql-superuser -pyour-superuser-password

mysql > source /usr/share/phpMyAdmin/examples/create_tables.sql
Log in to PMA
Now you can log into PMA with your mysql root user credentials. https://yourhost.tld/phpmyadmin
- Create a mysql user, pma, with the password you added to the config file, with no default permissions, on localhost
- Give pma user all permissions on phpmyadmin database, on localhost
Now you have a secure PMA which will work for all mysql users on your host. Version 3.5+ now has Status Monitoring and Advisor. Used in conjunction with a performance tuning script like MySQL Tuning Primer, it will help you fine-tune your MySQL server to your requirements and your environment.

No comments yet.